Add Favicon Images To A Next.js Website
A favicon is a logo for your website that appears alongside the meta title on your browser tab and in various other places depending on the device. The browser by default will show a blank document icon, but you can help users recognize your website better by using a custom icon.
In this article, we'll walk through how to get these icons added to your Next.js website and get them displayed.
We'll add several icons and images that'll be used across a multitude of different devices and browsers. Here's the list with a quick explanation for each:
favicon.ico: used predominantly by Internet Explorer, but other browsers will default to using this icon if no other options are provided.favicon-16x16.png: classic icon displayed in the tabs of most browser windows.favicon-32x32.png: used by Safari on Mac OS machines.android-chrome-192x192.png: used in the Chrome browser on Android devices at varying screen densities.android-chrome-512x512.png: used in the Chrome browser on Android devices at varying screen densities.safari-pinned-tab.svg: the icon used when users pin your website on iOS devices.apple-touch-icon.png: iPhone and iPad users can turn web pages into icons on their home screen for quicker access. These links appear as a regular iOS native application. When this happens, the device looks for a specific picture.
And we'll also add a file named site.webmanifest. This is a simple JSON file, defined by W3C and supported by Google, that is used by Android Chrome devices to declare the Add to home screen icon and other settings. Both the android-chrome-192x192.png and android-chrome-512x512.png icons will be referenced in the site.webmanifest file.
In this section, we'll first obtain the necessary images and icons. Then, we'll add the icons to your Next.js website using the Head built-in component.
Let's jump right into it and get these icons added to your website!
Table Of Contents
Obtain The Necessary Images
The first thing we need to do is get the necessary images for the icons listed above.
We'll use the Real Favicon Generator website to create our favicon icons and manifest file. All we need to do is upload the image we want to use and their website will do the heavy lifting in creating the necessary icons.
First, we need an image to use.
You can use any other image you want. Just ensure that it has dimensions of at least 70px x 70px.
Once you have the image you want to use, go to the Real Favicon Generator website in your browser, click on the Select your Favicon image button, and choose your desired image.

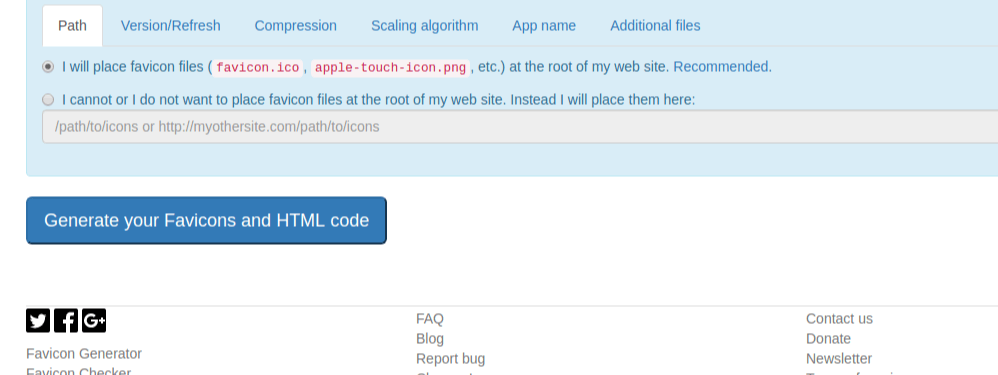
This will lead you to a page where you can configure some different settings for your icons. You can skip those sections and scroll to the bottom where there is a button labeled Generate your Favicons and HTML code.
Click that button to generate your icons.
When their website is done generating the icons, click the Favicon package button to download the zip file containing your icons.
Locate the downloaded zip file on your local machine and unzip the file if needed.
Now that you have the necessary images, you need to add them to the /public directory inside your Next.js application. The /public director should be located in the root of your project and allows its file contents to be served by your Next.js application starting at the base URL ("/").
If you don't already have a /public directory in your Next.js application, create one in the root of your project folder:
mkdir public
Then, move each file from the list below into your /public directory:
favicon.icofavicon-16x16.pngfavicon-32x32.pngandroid-chrome-192x192.pngandroid-chrome-512x512safari-pinned-tab.svgapple-touch-icon.pngsite.webmanifest
Once those files have been moved, they will be accessible starting at the base URL ("/") on your website.
You can test this by going to your browser and opening this link: http://localhost:3000/favicon.ico.
If all is well, you should see your favicon.ico image displayed. You can test the same thing with all the other files you added to the /public directory.
We can now configure your application to display the favicon images.
Add Images To Your Page
Now that we have our icons, let's get them added to your Next.js website.
Your favicon images need to be added to the head section of your page. To do this, we'll use the built-in Next.js component called Head.
Open the page you want to add the favicon images to and first import the Head component at the top of the file:
import Head from "next/head"
Then, add the <Head> component to the page with this content:
<Head>
  <link rel="icon" type="image/png" sizes="32x32" href="/favicon-32x32.png" />
  <link rel="icon" type="image/png" sizes="16x16" href="/favicon-16x16.png" />
  <link rel="apple-touch-icon" sizes="180x180" href="/apple-touch-icon.png" />
  <link rel="manifest" href="/site.webmanifest" />
  <link rel="mask-icon" href="/safari-pinned-tab.svg" color="#5bbad5" />
  <meta name="theme-color" content="#ffffff" />
</Head>
Most of the tags we added are pretty straightforward, including the <link rel="icon">, <link rel="apple-touch-icon">, <link rel="manifest">, and <link rel="mask-icon"> icons. These tags give instructions to specific browsers and/or devices on what icon it should use.
But, the <meta name="theme-color"> tag is one we haven't discussed. This tag provides a way to suggest a color that browsers should use to customize the display of the page or the surrounding user interface. For example, browsers might use the color for the page's title bar or use it as a color highlight in a tab bar or task switcher.
We gave the <meta name="theme-color"> tag a color value of "#ffffff" (white), but feel free to replace it with whatever color you want.
When you add both code snippets to your page, it should look something like this:
import { Component } from "react"
import Head from "next/head"

export default class extends Component {
  render() {
    return (
      <>
        <Head>
          <link rel="icon" type="image/png" sizes="32x32" href="/favicon-32x32.png" />
          <link rel="icon" type="image/png" sizes="16x16" href="/favicon-16x16.png" />
          <link rel="apple-touch-icon" sizes="180x180" href="/apple-touch-icon.png" />
          <link rel="manifest" href="/site.webmanifest" />
          <link rel="mask-icon" href="/safari-pinned-tab.svg" color="#5bbad5" />
          <meta name="theme-color" content="#ffffff" />
        </Head>
        <div>Page Content</div>
      </>
    )
  }
}
The <Head> component should be the first item inside the return() React method.
On your website, you should now see the favicon icon in the browser tab for that page.
In the future when your website loads on different browsers and devices, the appropriate icon or image from your /public directory will be displayed.
Thanks for reading and happy coding!